140‐Day QuickBooks Trial Software
Installation Guide
This guide will help you install the 140‐day trial version of QuickBooks that is associated with your textbook. Depending on your textbook, the software may be available via digital download or DVD. This guide includes instructions for installing the software using both methods. Also included are instructions for toggling to the Pro edition of the software, which is necessary for some users. Be sure to check out the Common Questions section at the end of this guide.
|
|
Contents |
|
|
|
| Note! Your QuickBooks trial software is intended for use on a Windows‐based PC. The | |
software cannot be installed mobile devices using the iOS or Android operating system. |
|
Please see this page for more information on system requirements to install QuickBooks. |
Installing QuickBooks – Digital Download
If your trial version of QuickBooks is provided via digital download, you will access the software from the Intuit website.
Before you get started, make sure you have your license number and product number handy.
15‐digit license number: ___ ___ ___ ___ – ___ ___ ___ ___ – ___ ___ ___ ___ – ___ ___ ___
6‐digit product number: (QuickBooks 2014) 602 – 834 (QuickBooks 2015) 503 – 154
1.Close all running programs, including antivirus programs.
Remember to restart your antivirus program(s) after the software installation is complete. Avid Dnxhd Codec Premiere
2.Open a web browser and navigate to http://quickbooks.com/download.
These instructions use Internet Explorer. Different web browsers may behave differently.
3.Click the QuickBooks Accountant link for your version of QuickBooks.
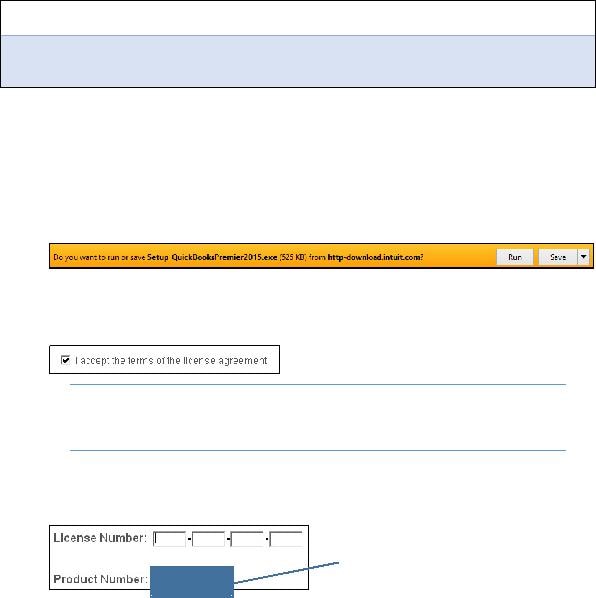
4.Choose the Run option in the download bar, and then choose Yes in the dialog box that appears.
Continue with the next step after the download completes.
5.Click Next in the wizard screen, and then click Next in the Intuit QuickBooks Installer window. While Adobe’s native engine is powerful, the Avid
6.Click the checkbox to accept the terms of the license agreement; click Next.
Tip! If desired, use the Print link at the top‐right corner
of the window to print the License Agreement for your records.
7.Ensure that the Express (recommended) installation type is selected; click Next.
The Express installation will place QuickBooks in the default location on your computer.
8.Type your license number and product number in the provided boxes; click Next. Unlike "interframe" codecs like H
For QuickBooks 2014, use 602‐834.
For QuickBooks 2015, use 503‐153.
9.Click Install.
The installation can take time, so be patient!
10.Click Open QuickBooks in the screen that appears after the installation is complete.
11.If a notice regarding how QuickBooks uses your Internet connection appears, click OK.
The QuickBooks trial software is now installed on your computer.
12.Toggle to the Pro edition of the software, if necessary for your course.
Codec Premiere | Avid Dnxhd
While Adobe’s native engine is powerful, the Avid DNxHD codec provides a level of stability and cross-platform reliability that raw camera formats cannot match. By trading disk space for computational efficiency, editors can focus more on the creative rhythm of the story and less on the technical limitations of their hardware.
DNxHD (Digital Nonlinear Extensible High Definition) was designed by Avid specifically for multi-generation editing. Unlike "interframe" codecs like H.264, which compress data across multiple frames to save space, DNxHD is an codec. Every single frame is compressed individually. This makes it significantly easier for your CPU and GPU to decode, leading to smoother playback and more responsive scrubbing in the Premiere timeline. Why Use It in Premiere?
Avid DNxHD in Adobe Premiere Pro: A Seamless Workflow For video editors, the choice of an intermediate codec is a critical decision that balances visual quality with system performance. While Adobe Premiere Pro is famous for its "native" editing capabilities—handling everything from H.264 to RED RAW— incorporating the codec into a Premiere workflow remains a gold standard for professional post-production . The Purpose of DNxHD
DNxHD is an industry-standard "mezzanine" codec. If you are sending a project from Premiere to an assistant editor using Avid Media Composer, or to a colorist in DaVinci Resolve, DNxHD ensures the file looks and behaves identically across all platforms.
Perfect for the "online" edit or final delivery. Conclusion